Navigating websites can be tricky sometimes so we have put together this tutorial to help you through your order with easy to follow step by step instructions.
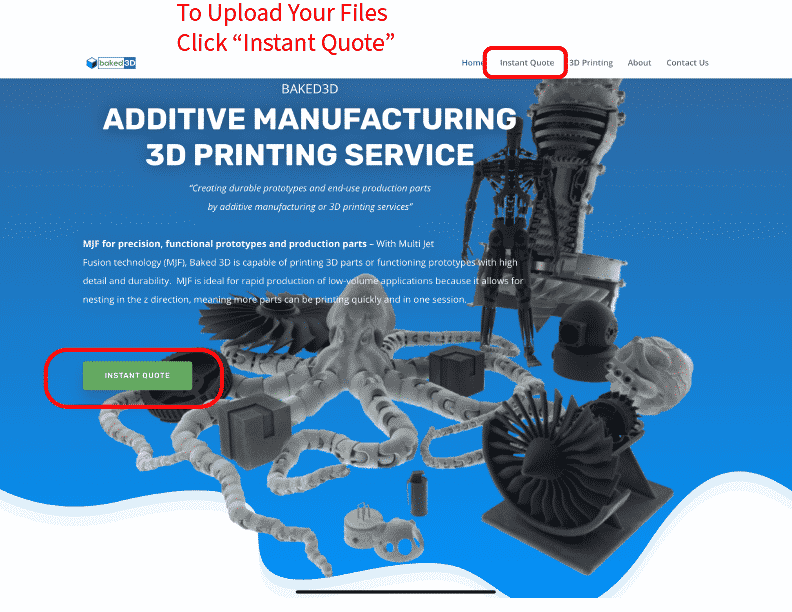
First step is to get to the Quote page. To get there you will have to locate the “INSTANT QUOTE” button. There is a big green button in the homepage and also a clickable link on the navigation bar at the top of the page. Either of these links will take you to the same page.
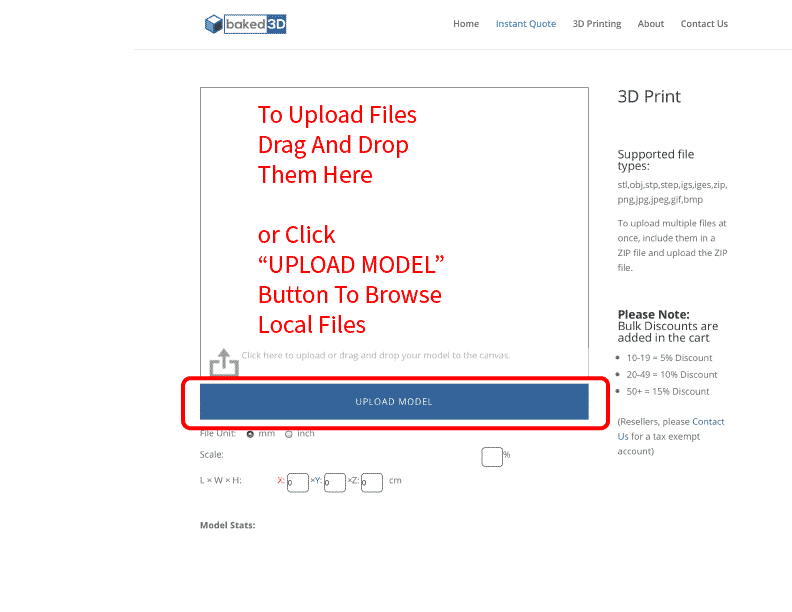
Once there you will see an empty window where your preview will be generated. You can do this one of two ways. You can drag and drop your file into the viewing window and it will auto generate a preview, or you can click the box under the window that says “UPLOAD MODEL” and this will open a window that allows you to pick files from your computer.
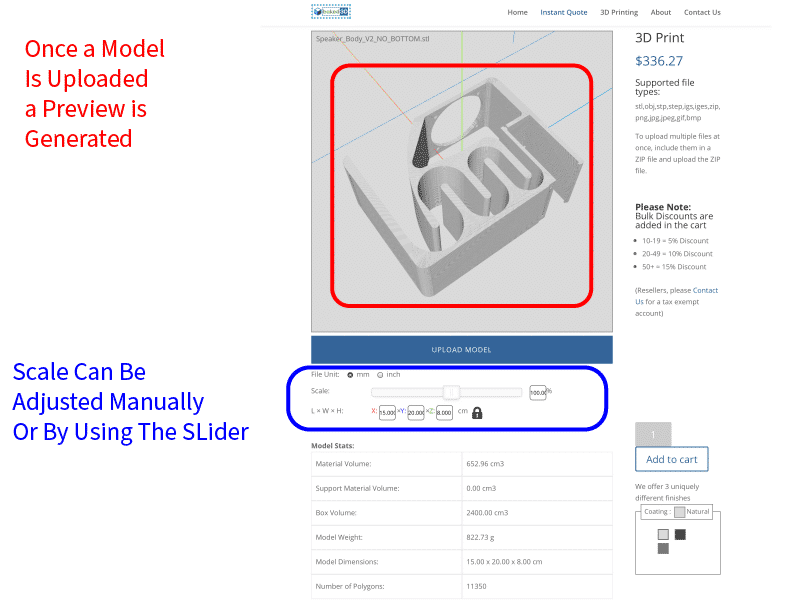
Once your 3D print preview is generated a price will also be auto generated.
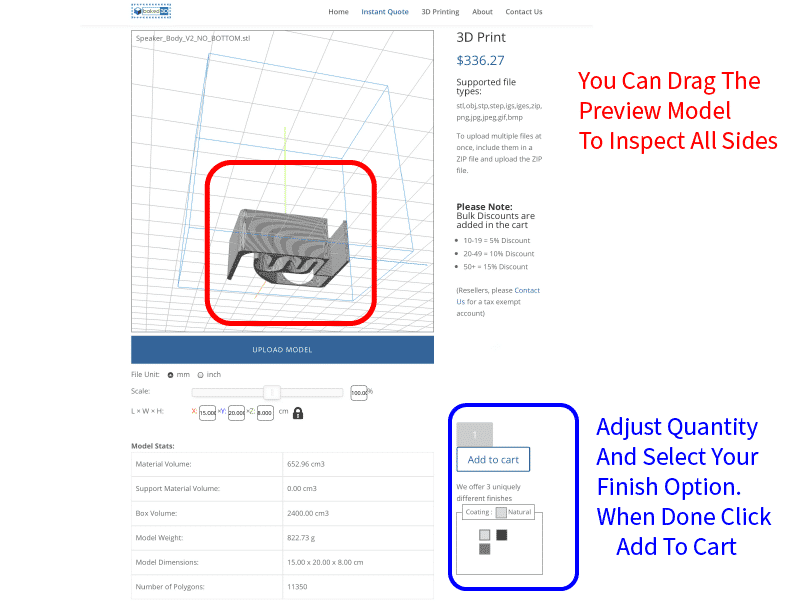
Next you can click inside of the window with your left mouse button and spin the 3D part around so you can inspect all sides. To zoom in and out use the scroll feature on your mouse, and if you right click and drag the part will slide whichever direction you move the mouse.
Under the preview window there are options to switch the unit type from inches to millimeters, which changes the size of the part, so be sure to have it on the correct option. The “scale” slider allows you to change the size of the part while keeping all the features the same.
If your parts look good and they are the correct size you can now enter the quantity of the desired part you need and desired finish on the right. We offer three uniquely different finishes.
Our Raw finish is just media blasted to remove unused powdered material left over from the build and is a flat grey color.
For our Black finish option we media blast the finished parts then dye them black in a permanent solution that penetrates into the material. Not like a spray finish which can wear off.
Our favorite is the Graphite finish which leaves the parts a smooth dark grey color that is glossy in the light.
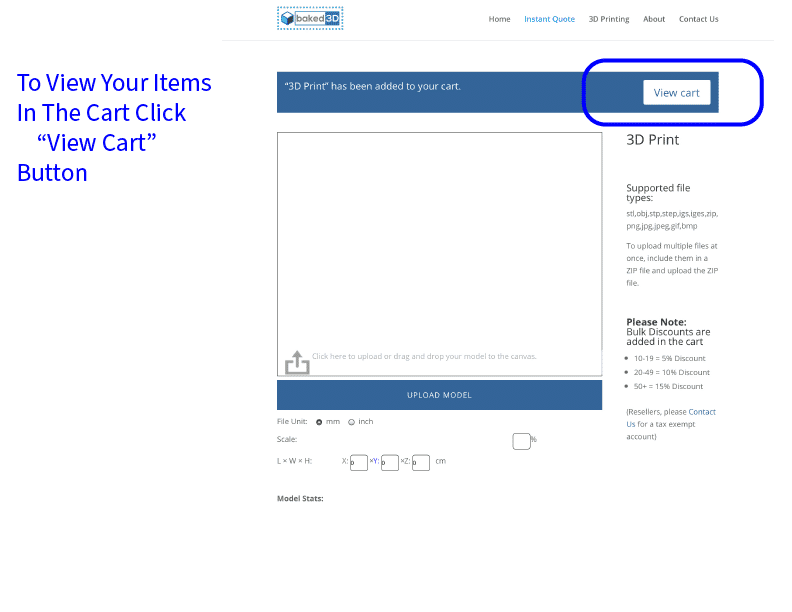
Directly under the Quantity selection box there is a button “Add to cart” this will place your items in your shopping cart for checkout. When you have everything set up correctly press the add to cart button. If you have other models to upload you can upload them now. If you do not have any other models to upload you can push the button that says “View cart” or click the little shopping cart at the top right of the screen.
In the shopping cart area you will see your items displayed, along with the quantity which you can again change if you need to just by entering a new number in the box and clicking “Update Cart”.
If you have a coupon code you can enter it inside the box that says “coupon Code” and then hit “Apply Coupon” and it will adjust your total automatically.
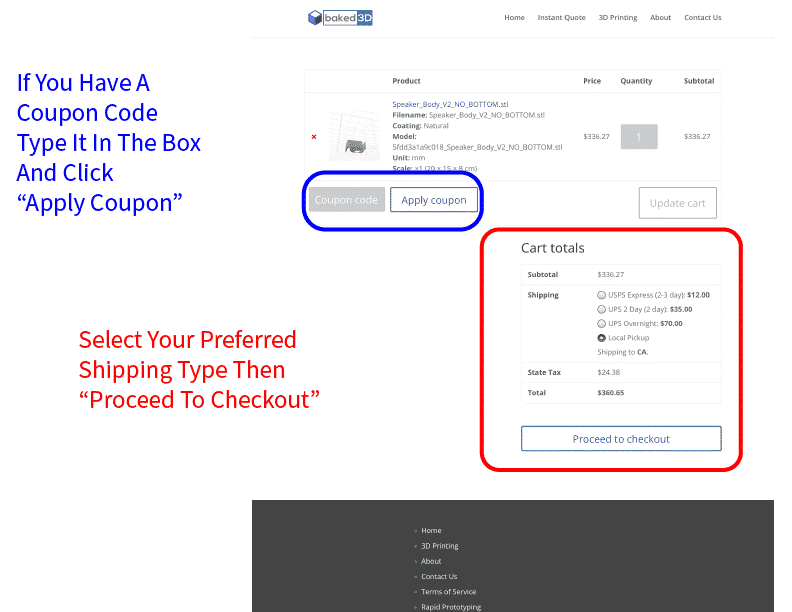
If everything looks good then all you have to do is select your desired shipping and “Proceed To Checkout”
Thanks for using Baked3D!

Recent Comments